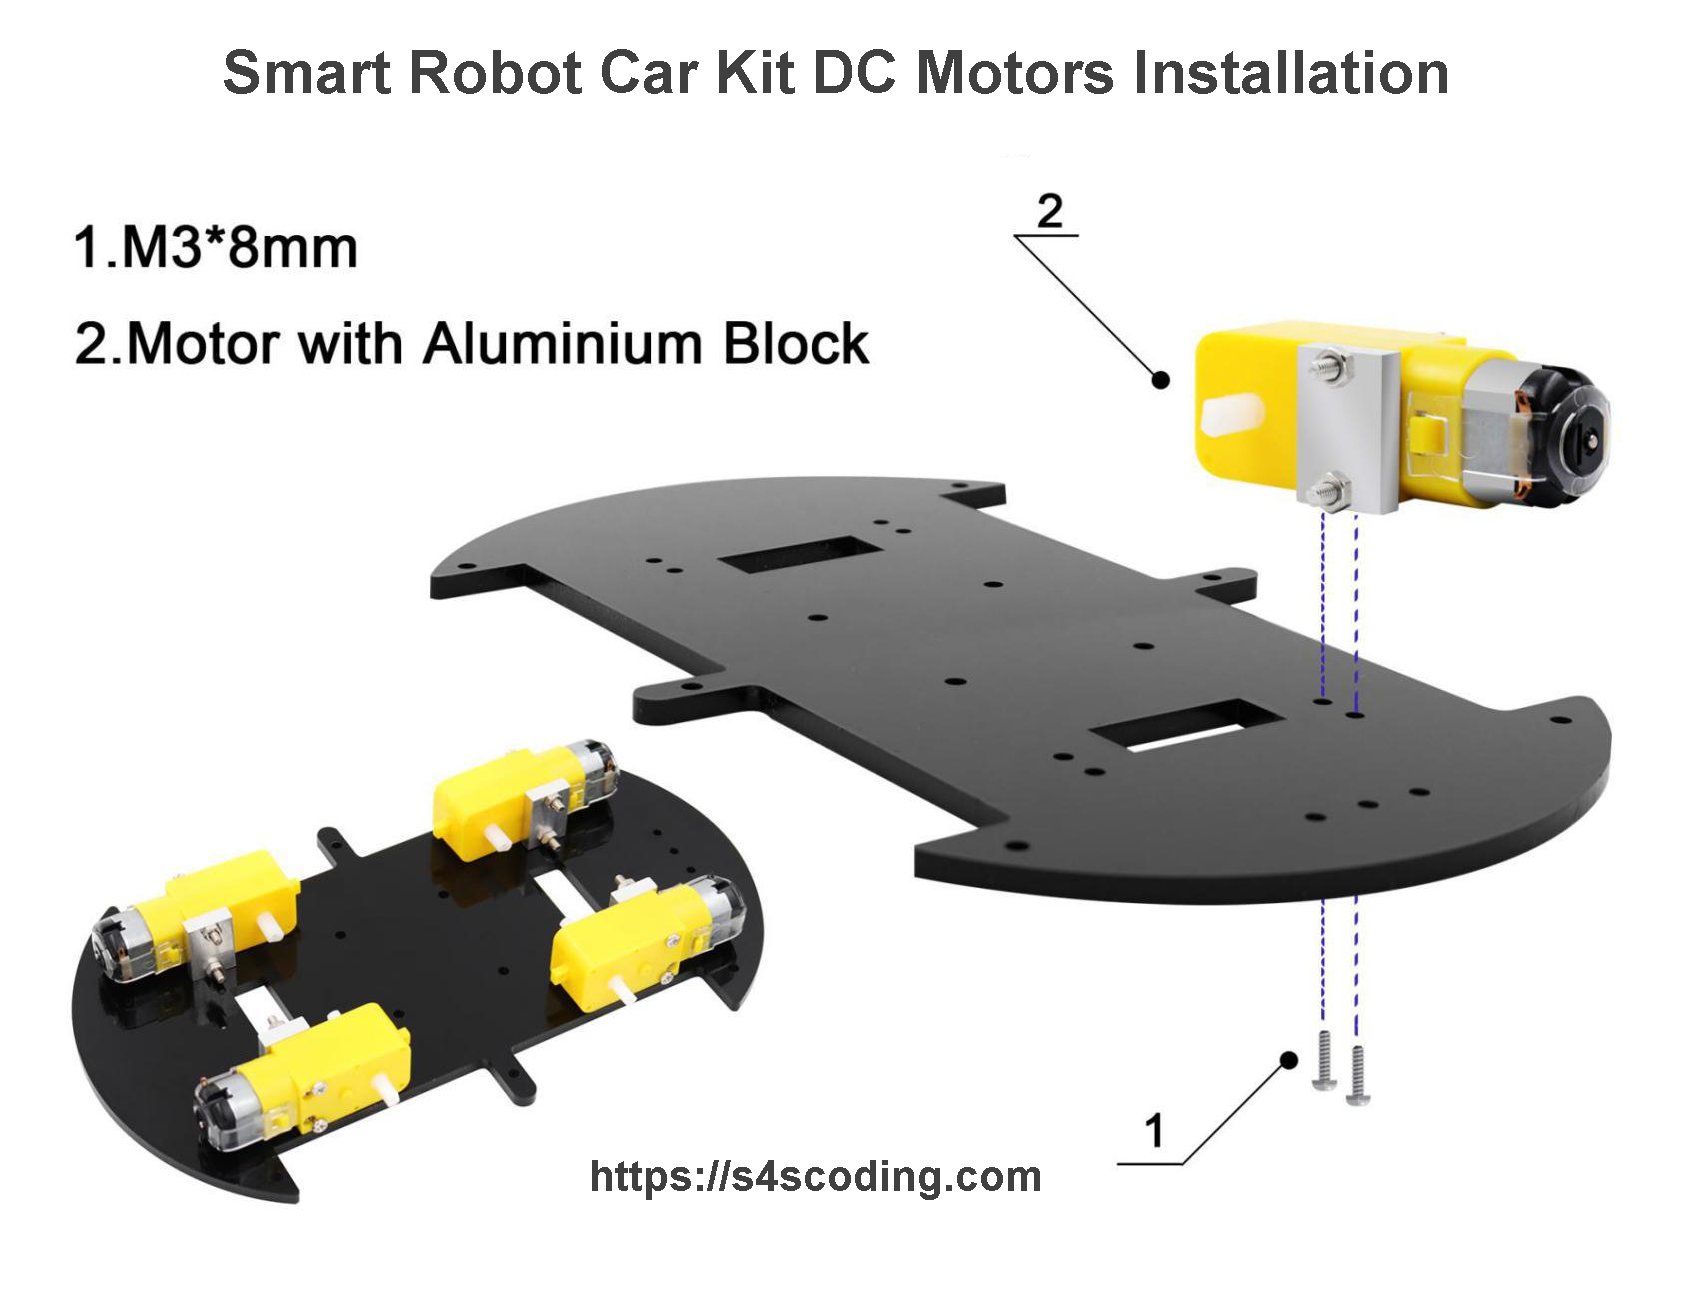
Smart Robot Car Kit DC Motors Installation
Step 2 is to attach the prepared robot DC motors from step 1 onto the robot cars bottom acrylic chassis base.
You will need:
- 4x Prepared Robot Car DC Motors
- 8x M3*8mm Bolts
- 1x Bottom Acrylic Chassis Base
The 8x M3*8mm bolts are within the same zip lock bag as the aluminum blocks etc… from step 1.
Attach each prepared robot DC motor onto the robot cars bottom acrylic chassis base (with two M3*8mm bolts each) so the aluminum blocks and motors wires are on the inside and the visible metal parts of the DC motors are located on the outside ‘corners’ of the bot.
Smart Robot Car Kit DC Motors Installation Notes
The M3*8mm bolts screw into the aluminum blocks, if you find they don’t screw in easily try to avoid forcing, they could cross thread. The aluminum blocks have bolt holes on both sides, try detaching the aluminum block (reverse Step 1), turn the aluminum block around so the other two bolt holes are used instead.
The robot cars bottom acrylic chassis base is quite sturdy, but it is acrylic, if you over tighten the bolts the acrylic could be damaged.
Continue Reading Arduino UNO Smart Robot Car Kit Instructions


When to Teach Coding in Primary Schools #Coding #Teachers...
Arduino IDE Library Installed Successfully #Arduino...
The most popular topics covered by Dojos are Scratch, HTML/CSS, Python, Raspberry Pi, Arduino, and...
Change Your Raspberry Pi Password #RaspberryPi...
Connect to a Raspberry Pi Securely Using SSH #RaspberryPi #CyberSecurity...
Update Arduino Libraries Using the IDE Library Manager #Arduino...