The Arduino Integrated Development Environment (Arduino IDE) is the free software required to interact with your Arduino controller board, without the Arduino IDE you can’t program your Arduino microcontroller to do cool stuff like control a cool robot car.
Choose a device to install the Arduino IDE software on, in the example below I’ll be installing the software on a Desktop PC running Windows 7.
Download the Arduino IDE Software
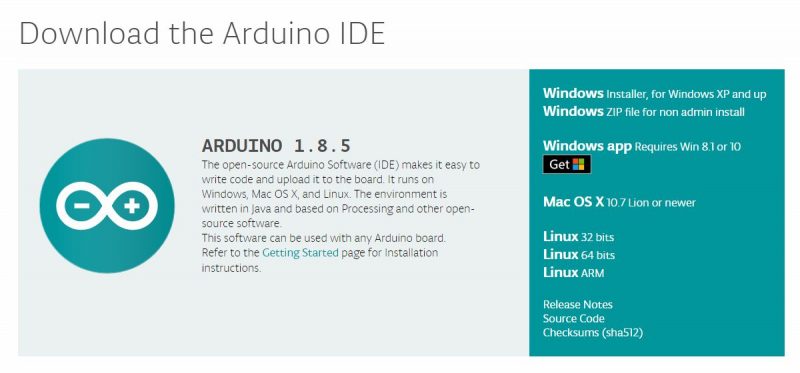
Go to the Arduino IDE Download webpage & download the relevant version for your device.
The Arduino IDE software is available for Windows, Mac and Linux operating systems.
Since I’m installing on a Desktop PC running Windows 7 I downloaded the Windows Installer, for Windows XP and up with filename: arduino-1.8.5-windows.exe.
Install the Arduino IDE Software
Install the Arduino IDE software by running the downloaded file and follow the instructions. Installing the IDE software is like installing any software on a PC, lots of mouse clicking :-)
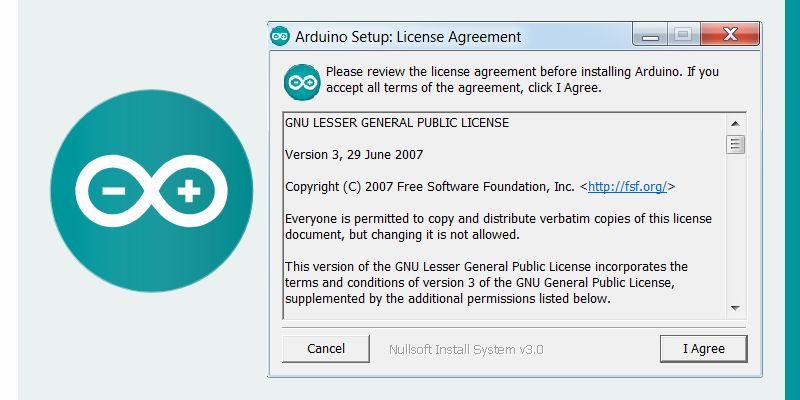
Read the Arduino License agreement and click the “I Agree” button.
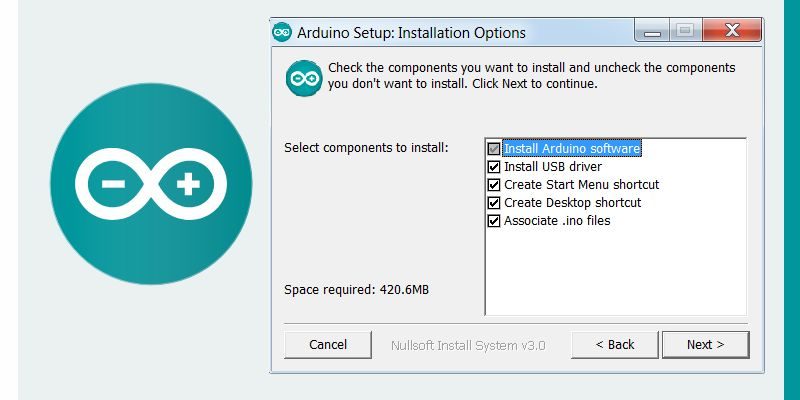
Unless you have a reason to change them, keep all the Arduino IDE software components ticked and click the “Next” button.
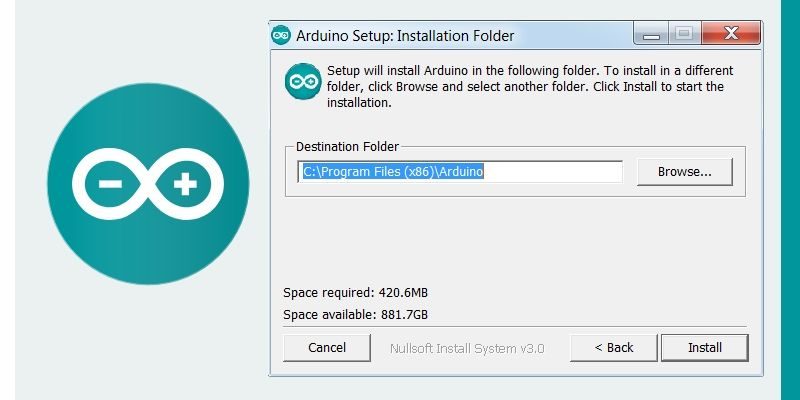
On the next window you can choose to change the folder where the Arduino IDE software is installed, or keep the default location and click the “Install” button.
The Arduino software will start to install.
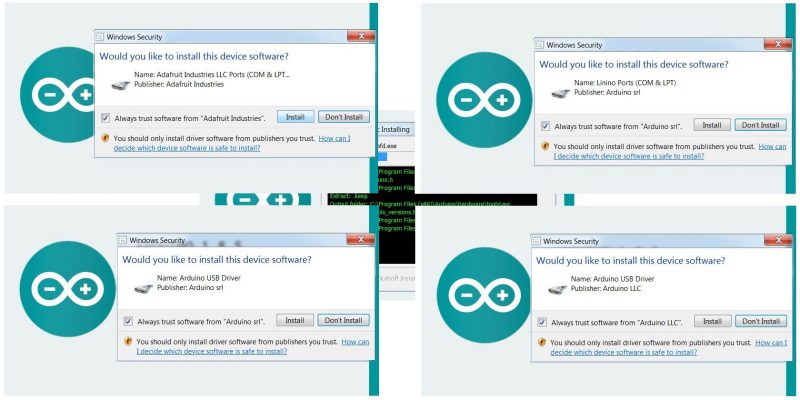
This can take sometime and you’ll be presented with various drivers to install including Arduino USB drivers and COM/LPT port drivers, I suggest you install them all.
When complete the Arduino IDE Software is ready to run.
Running the Arduino IDE Software
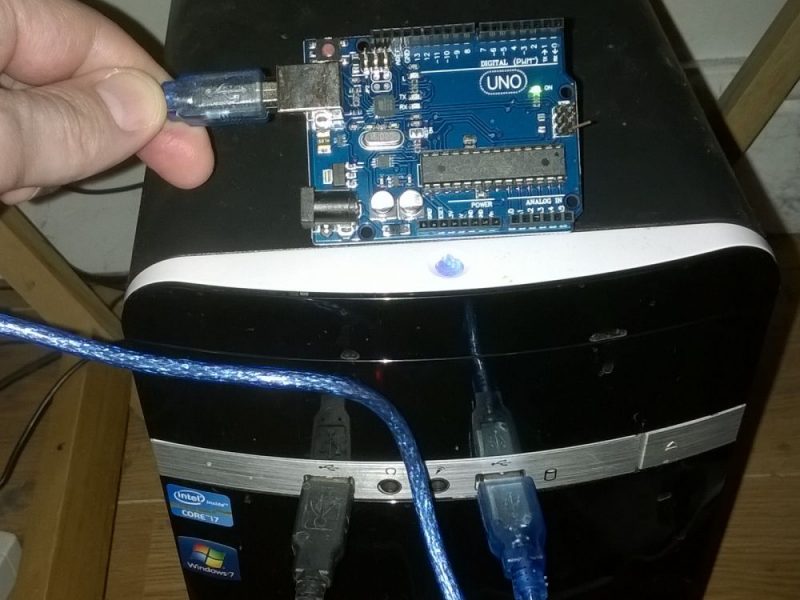
Attach your Arduino Microcontroller board (I’m working with an Arduino UNO clone) to your device with a USB cable.
After connecting the Arduino UNO via USB to a Desktop PC, the power light on the Arduino UNO will light up (the USB cable powers the UNO board, no need for a power supply) and you should get a “Found New Hardware” message from Windows.
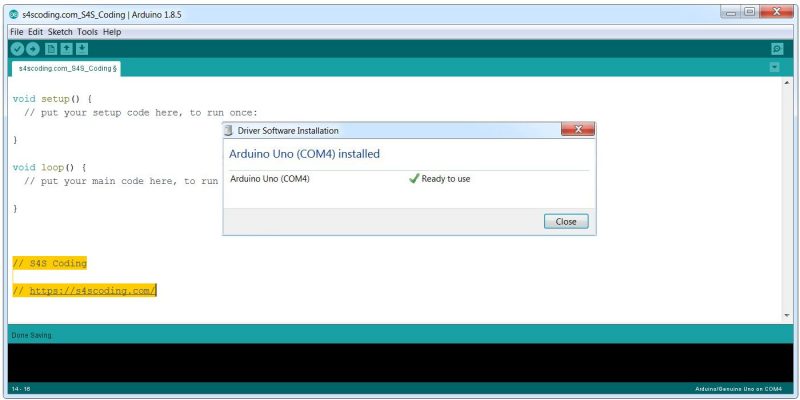
Windows will attempt to install the Arduino Driver Software. Some Arduino tutorials recommend canceling Windows automatically installing the Arduino driver software and installing manually via the Device Manager. No idea why they recommend making the process more difficult?
It took a while for Windows to install the driver for my UNO, but everything worked perfectly first time and the Arduino UNO was installed on COM4.
We are almost done.
Select the Correct COM Port
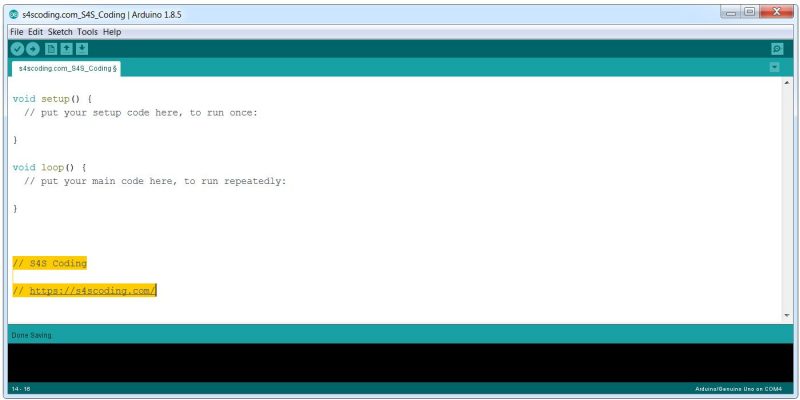
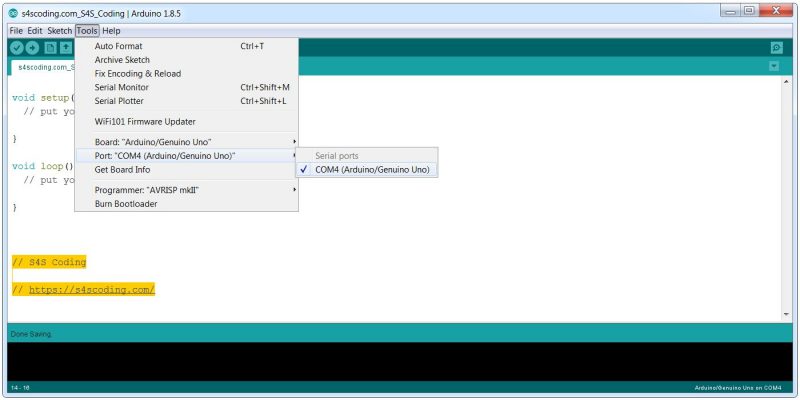
Although Windows has successfully installed the Arduino on COM4 (could be COM3 or another port) the Arduino IDE Software doesn’t automatically select the relevant serial port.
To select the correct port click “Tools”, hoverover ‘Port:”COM4 Arduino Genuino UNO”‘ and click “COM4 Arduino Genuino UNO”.
That’s it, you’ve successfully installed the Arduino IDE Software.
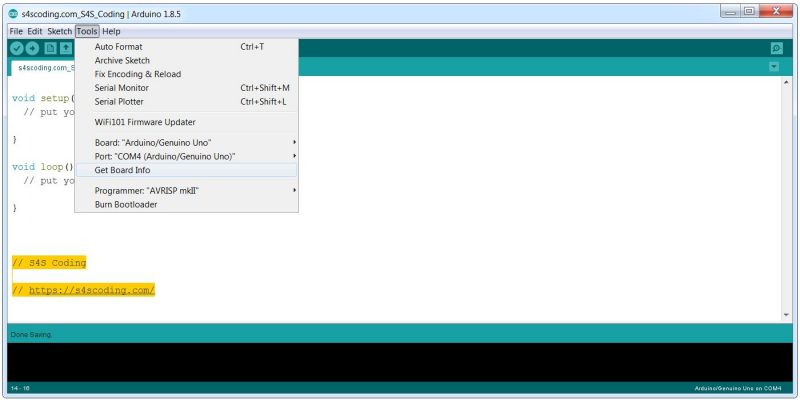
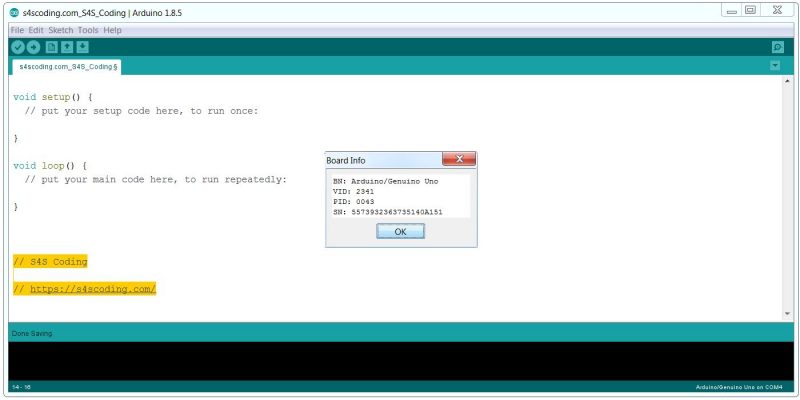
Feel free to confirm everything is setup correctly by going to “Tools” > “Get Board Info”.
The “Get Board Info” pop up will list information about your Arduino microcontroller board.
The board info above shows it’s an Arduino/Genuino UNO which in simple terms means it’s an Arduino UNO.




The most popular topics covered by Dojos are Scratch, HTML/CSS, Python, Raspberry Pi, Arduino, and...
Raspbian SSH Tutorial #Raspbian #RaspberryPi...
Cubetto Playset Coding Kit #Cubetto #Coding...
Google Blockly Games Maze 10 Solution #Blockly #Javascript #Coding...
Cross Curricular Lessons Motivate Children #Lessons #Coding #Teachers...
Google Coding for Boys: A simple Google image search for 'Coding for Boys' shows lots...