The Arduino Integrated Development Environment (Arduino IDE) Software can be extend by adding additional Arduino code libraries. Please note the Arduino tutorial below is for Windows users and assumes you’ve already downloaded and installed the Arduino IDE software.
What are Arduino Libraries?
Arduino libraries are collections of code which makes it possible for Arduino microcontroller boards like the Arduino Nano to connect to sensors, displays etc… Rather than having to create parts of a program (an Arduino program is called a Sketch) from scratch, a lot of the base code for communicating with various sensors etc… is available, pre-built to make programming easier.
For example, the built-in WiFi Arduino library makes it possible to communicate with a WiFi shield allowing Arduino boards to be accessed over a WiFi network.
There are hundreds of additional Arduino libraries available on the Internet for download, the built-in libraries and some of these additional libraries are listed in the Arduino Libraries Reference.
To use the additional libraries, we will need to install them.
How to Install an Arduino Library Using the Library Manager
To install a new library into our Arduino IDE software we can use the Library Manager: available since IDE version 1.6.2.
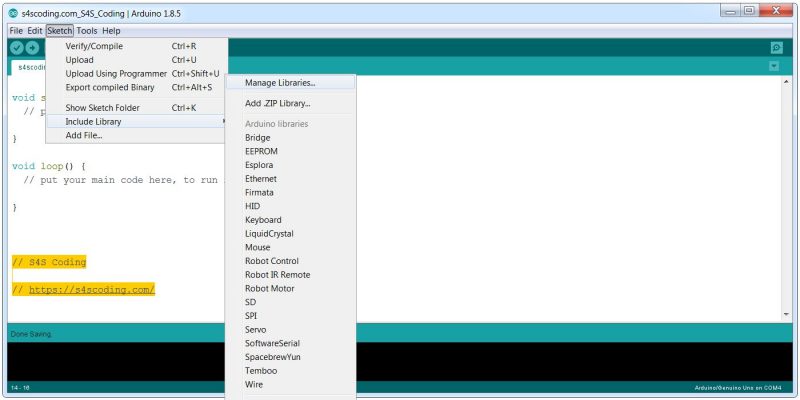
Open the Arduino IDE software and on the top file menu go to “Sketch” > “Include Library” > “Manage Libraries…”.
The Library Manager will open and we will find a list of installed libraries and libraries ready for installation. The Arduino has a large repository of free code collections (libraries).
In this tutorial we will update the Bridge library which is installed by default.
We could scroll through the Library Manager list of libraries looking for the Bridge Library or we can use the “Search” functions to save time.
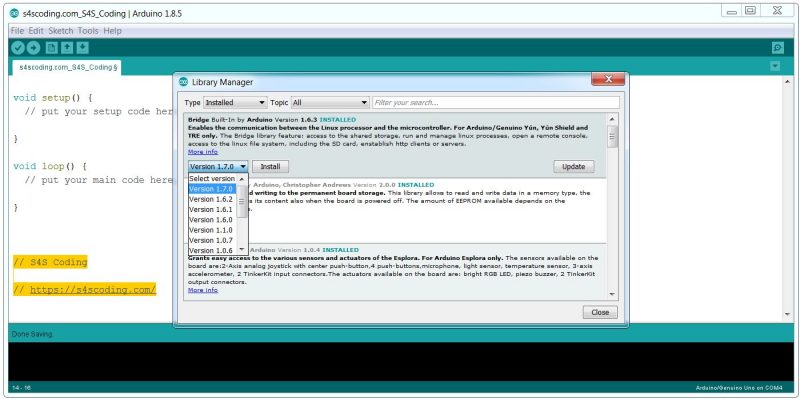
Since we know the Bridge Library (v1.6.3) is already installed and the libraries are sorted alphabetically, simply limiting the search to “Type” > “Installed” puts the Bridge Library near or at the top of the list: it’s alphabetically sorted.
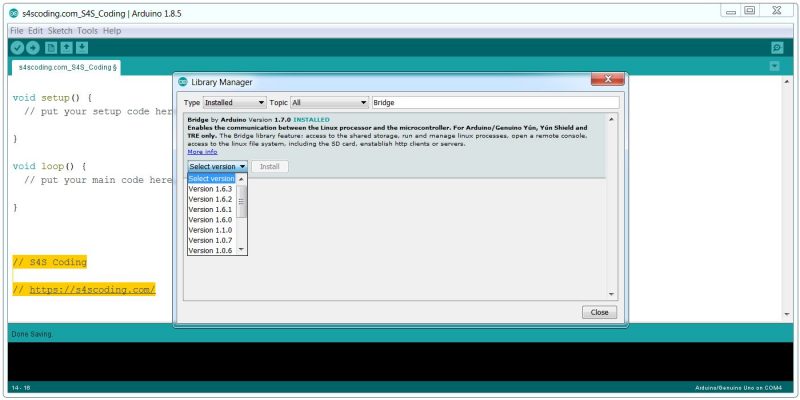
We could have used the “Filter Your Search” form (search for “Bridge”) to narrow the search as well.
Left click somewhere within the Bridge Library description ‘box’ and a “Version” selection menu and two buttons (“Install” and “Update”) become visible.
Select the version we want (v1.7.0 is the latest as of July 2018) and click the “Install” or “Update” button (doesn’t matter which) and the Arduino Bridge library updates to v1.7.0.
Note the library is downloaded over the Internet, so there might be a delay on slow connections.
If a library has only one version the “Version” menu won’t appear.
If a library is currently running the latest version the “Update” button won’t appear, but you can downgrade/rollback to an earlier version of library code (if available) via the “Install” button: if an updated library doesn’t work for your program/sketch, maybe an older version will do the job.
Once finished, an Installed tag will appear next to the Bridge library and will show the new version number (v1.7.0). Under the “Version” menu all the old versions are available (like v1.6.3) and only the “Install” button is available which allows for a downgrade.
We can close the library manager after updating.
Including an Arduino Library in a Sketch
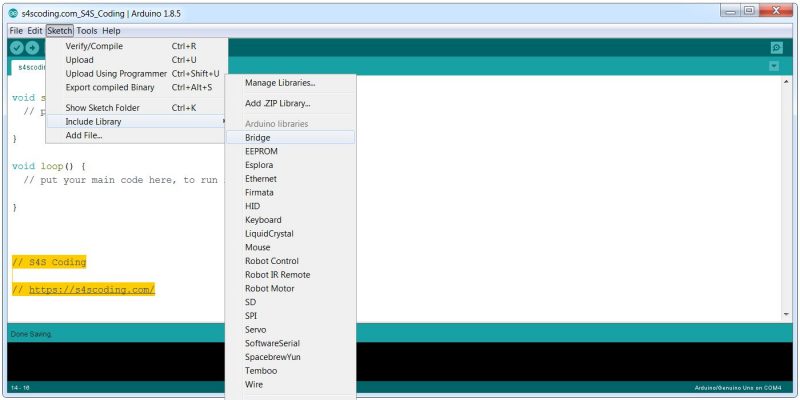
Installed Arduino libraries are listed under “Sketch” > “Include Library” : Click the library code you want to use in your current Sketch/program. For example to include the Bridge library it’s “Sketch” > “Include Library” click “Bridge”.
The Bridge library will be added to your program and will look like this code:
#include <Bridge.h>
 #include <BridgeClient.h>
 #include <BridgeServer.h>
 #include <BridgeSSLClient.h>
 #include <BridgeUdp.h>
 #include <Console.h>
 #include <FileIO.h>
 #include <HttpClient.h>
 #include <Mailbox.h>
 #include <Process.h>
 #include <YunClient.h>
 #include <YunServer.h>
How to Install an Arduino Library via the Add .ZIP Library
Not all Arduino libraries are available via the Arduino Software IDE Library Manager, 3rd party libraries for example can be installed via a zip file.
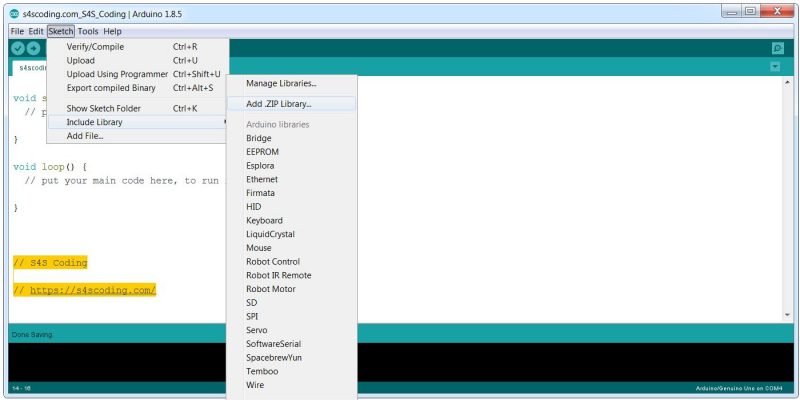
To import a .zip file go to “Sketch” > “Include Library” > “Add .ZIP Library…”
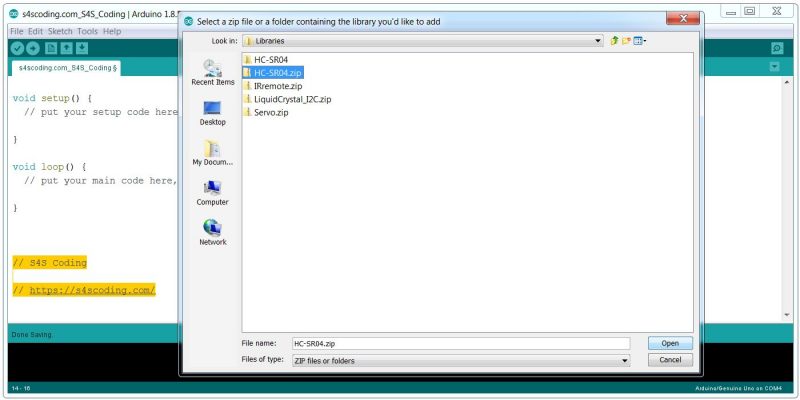
And go to the folder on your device containing 3rd party Arduino libraries: you will have to find and download them from the Internet or CD/DVD.
For example I’ll be working on a project soon which uses the HC-SR04 Ultrasonic Sensor which requires a 3rd party library: within a zip file HC-SR04.zip.
I’ll be importing the Arduino HC-SR04 Ultrasonic Sensor Library from the HC-SR04.zip file.
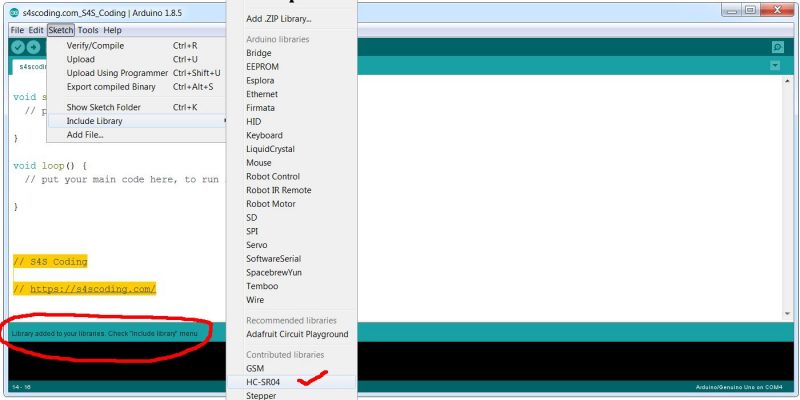
After importing the HC-SR04 Ultrasonic Sensor Library there will be a notice (near the bottom left of the IDE window within the green bar) confirming installation:
"Library added to your libraries. Check 'include library' menu".You can confirm the library installed via “Sketch” > “Include Library” : see the “HC-SRO4” entry in the menu within the screenshot above.
The HC-SR04 Ultrasonic Sensor Library can be included within a Sketch like any other Arduino Library.
How to Install an Arduino Library Manually
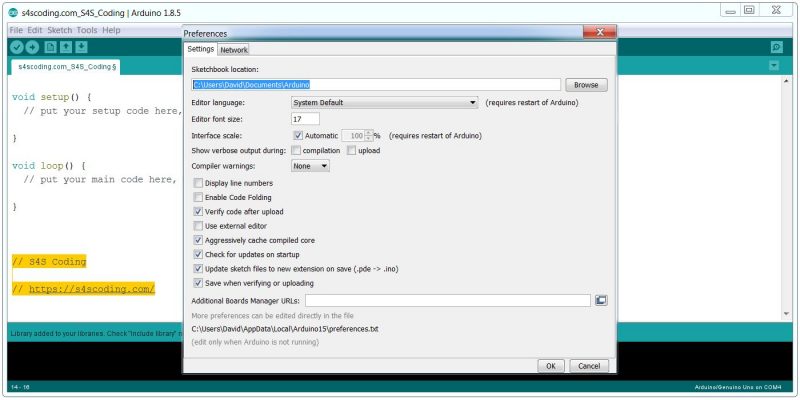
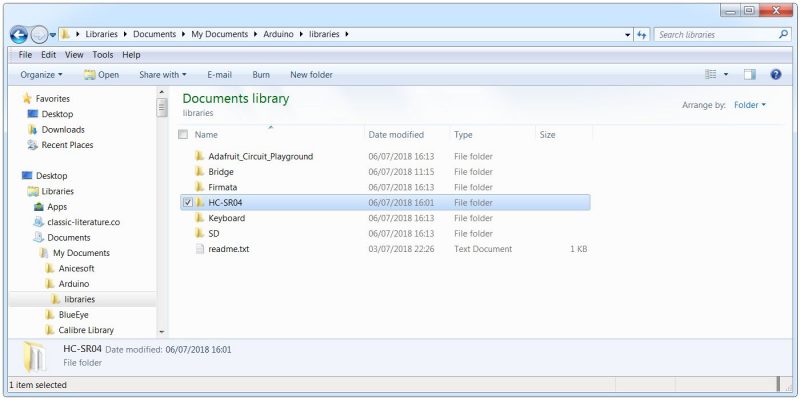
You can manually install a 3rd party Arduino library by unzipping a library zip file into the relevant Arduino IDE Software Library Manager Folder (the “libraries” folder). The Arduino folder can be found under “File” > “Preferences” : “Sketchbook Location:”.
The “libraries” folder is inside the “Arduino” folder.
There are lots of programs for extracting zip files, Windows includes a built in zip extractor. Browse to the folder holding the zip file, “Right Click” the zip file and click “Extract All…”. This will extract the contents of the zip file into a new folder with the name of the zip file minus the .zip.
For example extracting the “HC-SRO4.zip” file (it contains a 3rd party Arduino library for the HC-SR04 Ultrasonic Sensor) results in a folder called “HC-SRO4” which holds the HC-SR04 Ultrasonic Sensor Library files.
Simply “Right Click” on the “HC-SRO4” folder and click “Cut”. Browse to the Arduino IDE software library folder, probably under “C:\Users\######\Documents\Arduino\libraries\”: you can access the above via Windows Explorer, find the “Desktop” link, followed by “Libraries” > “Documents” > “Arduino” > “libraries” and “Right Click” inside the “Libraries” folder and click “Paste”.
This will “Cut & Paste” the “HC-SRO4” folder from wherever it was extracted into, to the Arduino “libraries” folder. Whatever you move to the folder the Arduino IDE Software can access as a library (assuming it contains a valid library).

