Use SSH With Your Raspberry Pi
With SSH you can access a Raspberry Pi from another computer on your network.
You’ll Need
- Raspberry Pi
- Raspbian OS
- Another computer on the network
What is Secure Socket Shell (SSH)?
Secure Socket Shell (SSH) is a networking technology that makes it easy to securely access your Raspberry Pi from another computer on your network.
The small size of the Raspberry Pi makes it perfect for projects around the home. When setting up your Raspberry Pi device, you’ll typically connect a keyboard, mouse, and display via the Raspberry Pi USB Port(s). But when you’re deploying it in the home, for example as a retro gaming console or media box, then you won’t want a keyboard and mouse attached to it.
More complex projects may even embed your Raspberry Pi in home devices where attaching a keyboard and mouse isn’t practical, or even possible. Having to extract your Raspberry Pi from its project and set it back up again every time you want to access it is a pain. And a needless one.
With SSH set up, and your Raspberry Pi connected to the same network as your laptop, you can connect to the Raspberry Pi using SSH and share files.
You can also work on the command line, editing files and making changes (although to work with the Desktop you’ll need to use a more advanced technology like VNC – Virtual Network Computing).
How To: Set Up SSH in Raspbian
Step 01 Connect Your Raspberry Pi to the Network
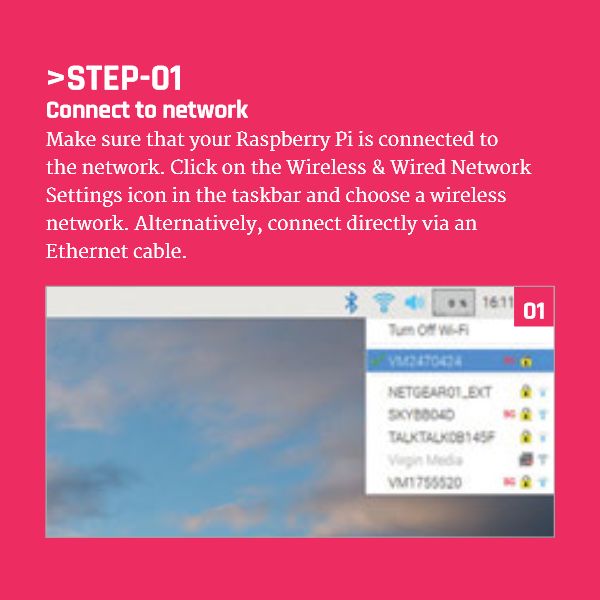
Make sure that your Raspberry Pi is connected to the network.
Click on the Wireless & Wired Network Settings icon in the taskbar and choose a wireless network.
Alternatively, connect directly via an Ethernet cable
Step 02 Enable SSH on Your Raspberry Pi
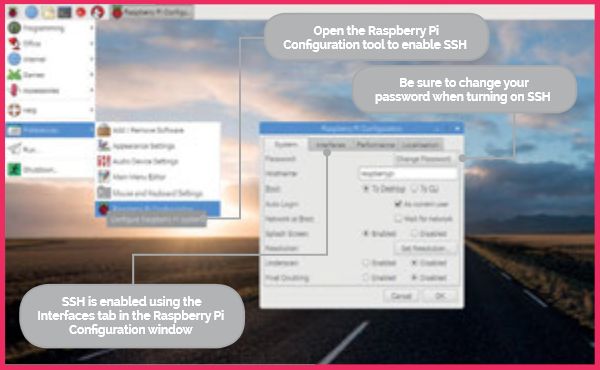
Click on the Raspberry Pi icon in the top-left of the screen and choose Preferences > Raspberry Pi Configuration.
Click on the Interfaces tab and choose the Enabled radio button next to SSH.
Step 03 Change your Raspberry Pi Password
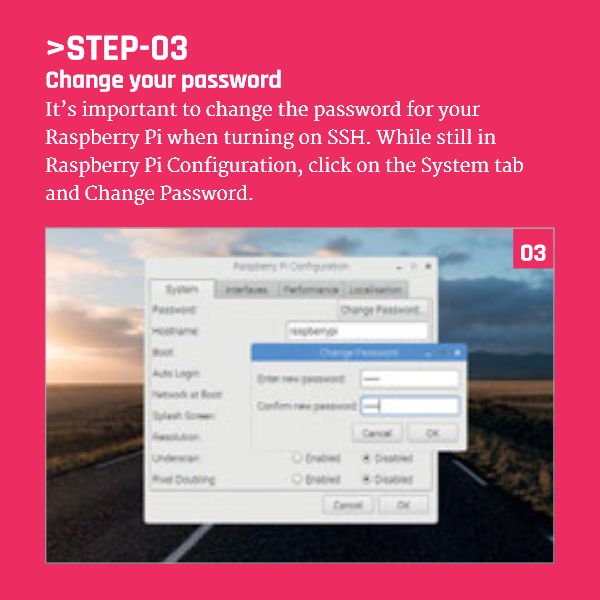
It’s important to change the password for your Raspberry Pi when turning on SSH.
While still in Raspberry Pi Configuration, click on the System tab and Change Password.
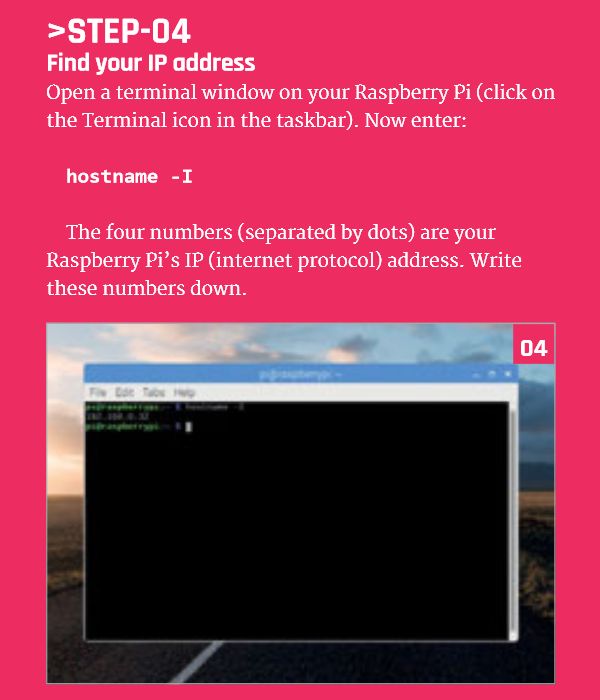
Step 04 Find your Raspberry Pi IP Address
Open a terminal window on your Raspberry Pi (click on the Terminal icon in the taskbar).
Now enter:
hostname -IThe four numbers (separated by dots) are your Raspberry Pi’s IP (internet protocol) address.
Write these numbers down.
Step 05 Connect to your Raspberry Pi with SSH from Linux, macOS, or Windows 10
You can use SSH to connect to your Raspberry Pi from a Linux or Windows 10 PC, or Apple Mac, without installing any additional software.
Open a Terminal window (Command Prompt in Windows 10) and enter:
ssh pi@192.160.0.32Remember to use your own IP address (from Step 4) after the @ symbol.
Enter yes and press RETURN to connect to the terminal.
Enter ls to view the directory files on your remote computer, and exit to log out.
Step 06 Connect to your Raspberry Pi with SSH on Older Windows PCs
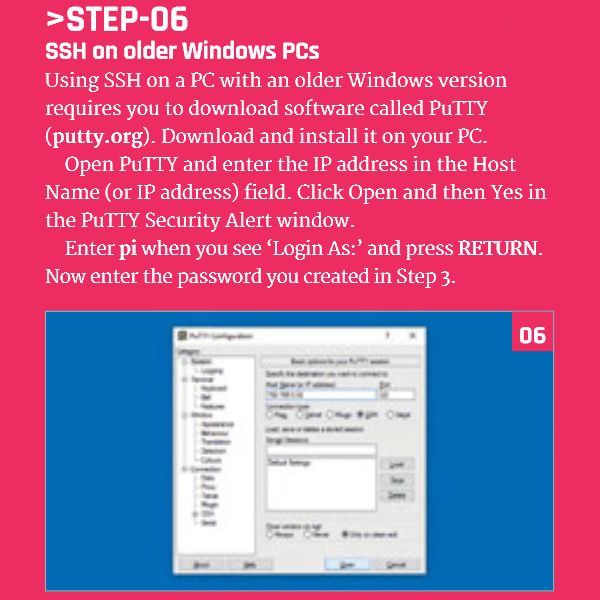
Using SSH on a PC with an older Windows version requires you to download software called PuTTY (putty.org).
Download and install it on your PC.
Open PuTTY and enter the IP address in the Host Name (or IP address) field.
Click Open and then Yes in the PuTTY Security Alert window.
Enter pi when you see ‘Login As:‘ and press RETURN.
Now enter the password you created in Step 3.
Step 07 Transferring Files to and from your Raspberry Pi via SSH
You can transfer files to and from your Raspberry Pi via SSH using file transfer software.
Our favoured program is FileZilla Client (filezilla-project.org), which is available for Windows, macOS, and Linux.
Deselect WebAdvisor and Avast Antivirus (or any other software bundled with the installer for Windows).
Choose File > Site Manager and New Site.
Enter the IP address in the Host field and choose SFTP in the Protocol drop-down menu.
Change the Logon Type to Normal and enter pi in the User field and your password (from Step 3) in the Password field.
Click Connect and OK.
Originally published in The MagPi Issue 70 : The official Raspberry Pi magazine! The above article includes modifications from the original article. License CC BY-NC-SA 3.0







How to Install an Arduino Library from a Zip File #Arduino...
Python Built-In Functions #Python #Coding #Teachers...
When to Teach Coding in Primary Schools #Coding #Teachers...
Google Blockly Games Maze 9 Solution #Blockly #Javascript #Coding...
Relative Frequencies of Letters in the English Language Graph #Python #Language #Teachers...
Attach The Arduino L298n Motor Driver Circuit Board ...